I built this dog bed for my own rescue pup, out of pine furring strips mostly. I'm sorry this isn't the greatest Tutorial/Plan for someone looking on How to Build a Dog Bed, but if you are familiar with building projects and just need a general idea, I hope this helps! The bed is made mostly with 1" x 4"s. Shorter Pieces of 1"x2"s, (1) 1"x6", and 2"x4" also used.
FYI- My dog is about 23 pounds and this bed is quite large for her.
FYI- My dog is about 23 pounds and this bed is quite large for her.
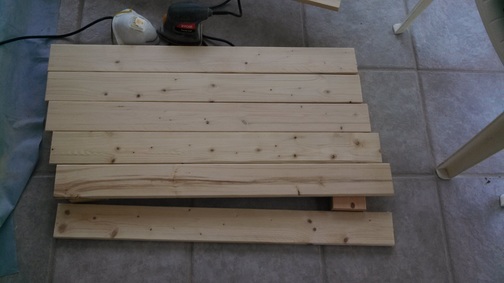
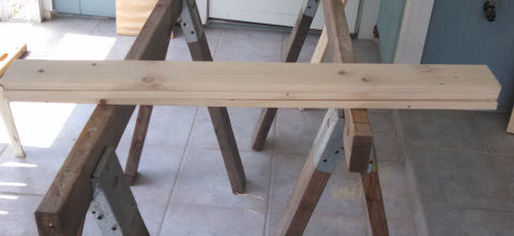
Qty (6) Pine 1" x 4" furring strips to form the base
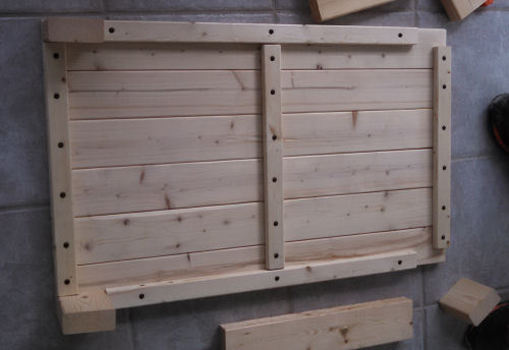
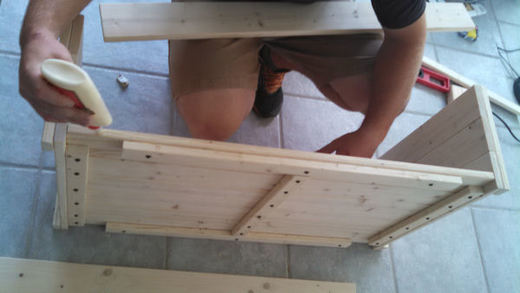
Looking at the bottom of the base of the bed. The pieces were glued together and attached with 1" x 2" furring strips & 1 1/4" Screws all along the edge and one down the middle, save for 4" on each corner for 2" x 4" feet. I actually used pocket screws because I happened to have them and I liked the way they look. (Even though this part won't be seen).
I made the feet out of 2" x 4" and cut them to 4" long. Glue these in place and attach with a screw from the Face-up Side.
I made the feet out of 2" x 4" and cut them to 4" long. Glue these in place and attach with a screw from the Face-up Side.
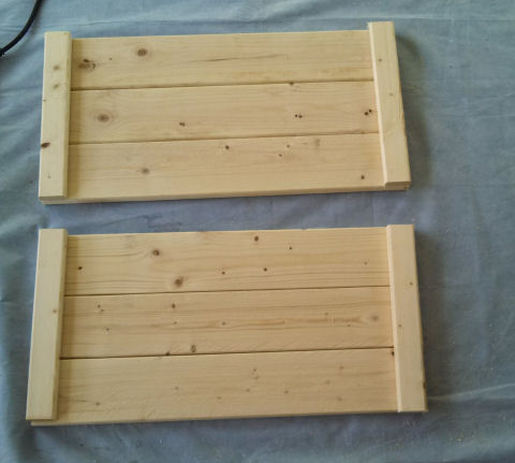
Sides
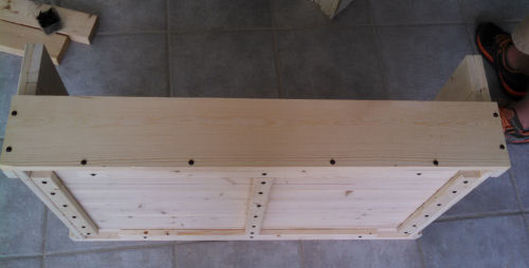
Qty (3) 1" x 4" Pine furring strips for each Side. The length of the side pieces are the same Depth as the Bottom Boards. Glue each piece together and attach the 1" x 2" on the sides with 1 1/4" Screws, one screw in each board.
Qty (3) 1" x 4" Pine furring strips for each Side. The length of the side pieces are the same Depth as the Bottom Boards. Glue each piece together and attach the 1" x 2" on the sides with 1 1/4" Screws, one screw in each board.
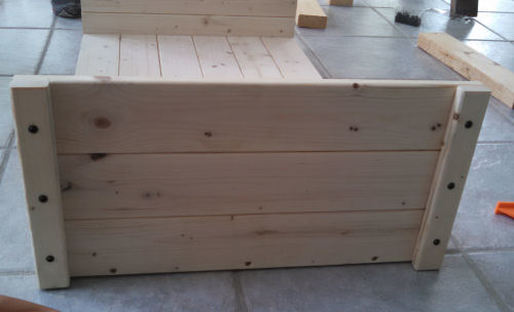
Attach the Side to the Bottom with wood glue and (3) Wood Screws along the bottom. Make sure these screw heads are flush or below the surface of the wood because another 1" x 2" will later be used to cover these up.
(3) 1" x 4" Pine strips form the back. The length of these need to be the
Length of the Base + 1.5" (Because of the Widths of the Sides)
Length of the Base + 1.5" (Because of the Widths of the Sides)
Add a bead of glue along the back edges where the back boards will be touching.

Back
Attach the three back boards with 1 1/4" screws, one for each board, on each side.
Attach the three back boards with 1 1/4" screws, one for each board, on each side.
Front
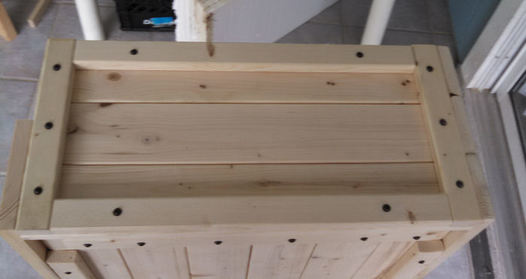
Flip the bed over so the Front Side is now facing up. I used a 1" x 6" piece of wood for the front. I glued along the edges where the board will be touching the bed, and attached with 1 5/8" screws along the edges as seen in the picture here.
Flip the bed over so the Front Side is now facing up. I used a 1" x 6" piece of wood for the front. I glued along the edges where the board will be touching the bed, and attached with 1 5/8" screws along the edges as seen in the picture here.
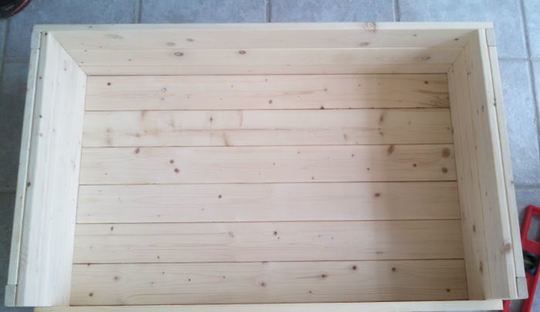
Complete the Sides
I finished the sides by adding 1" x 2" strips to the top & Bottom edges. Pieces like this I don't cut up front. I measure the gap and cut the exact size it needs.
Glue & attach with 1 5/8" Screws. I used 2 on the top & Bottom
I finished the sides by adding 1" x 2" strips to the top & Bottom edges. Pieces like this I don't cut up front. I measure the gap and cut the exact size it needs.
Glue & attach with 1 5/8" Screws. I used 2 on the top & Bottom
And it's Done! This unfortunately is the best shot I have of the completed project (unstained)
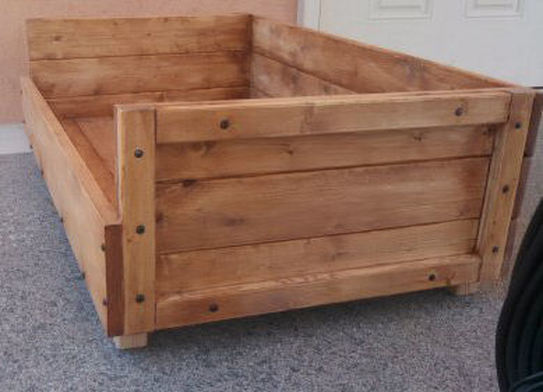
Fortunately I got some better ones of the stained product. I used a stain pad (rags would work great too). I think because I used Pine Strips, and Didn't apply Pre-stain it came out pretty uneven. However I actually like this look. It gives it a bit of a rustic look.
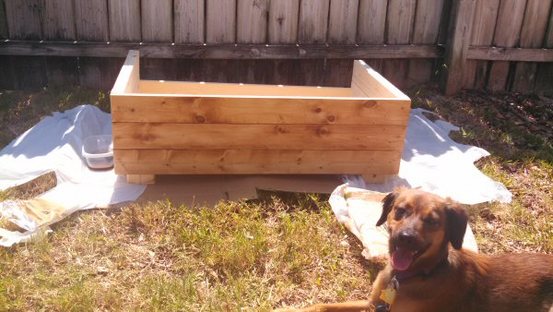
She's happy I'm almost done with her bed!
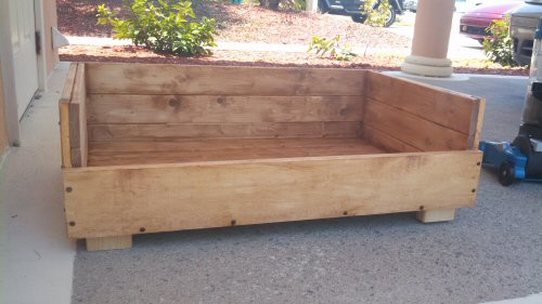
Completed Project
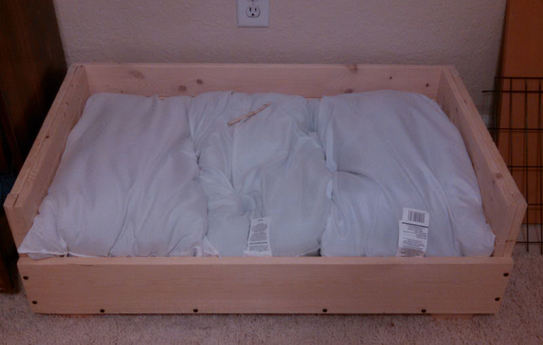
You could use any soft dog bed, pads or blankets. I decided to use 3 Standard Pillows. They fit perfectly and only about $4 each at Walmart.
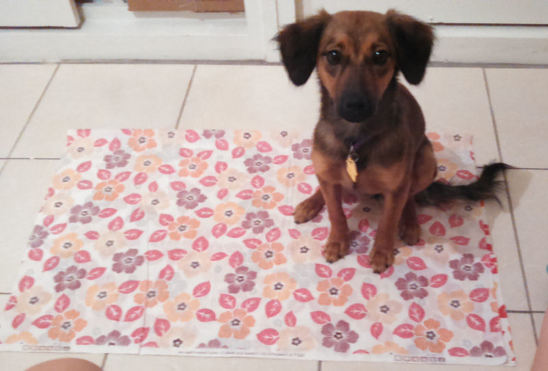
I bought some fabric from Michael's and sewed up an extra large Pillow Case. Kona loves getting in the way no matter what I'm doing.
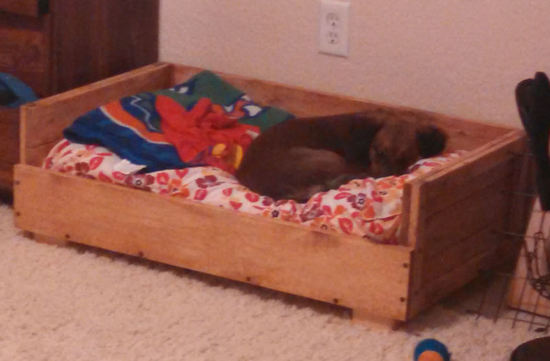
She loves her bed! Actually I had to give her a few treats at first to get her to go in and learn it's for her, and now she loves sleeping there at night.
My original plan was to add a piece of wood spraypainted with Chalkboard paint on the front and write her name, but I never got it. It's a cute idea though!
My original plan was to add a piece of wood spraypainted with Chalkboard paint on the front and write her name, but I never got it. It's a cute idea though!
